
MyLO - My Learning Online
Creating a Discussion Forum and Topic
Create a discussion forum
You can use forums to organise your discussion topics into categories. Your unit can have multiple forums and topics, but you must create a forum before you can create a topic since all topics belong to forums.
Note: When Creating a Forum you can automatically create a Topic with the same name at the same time.
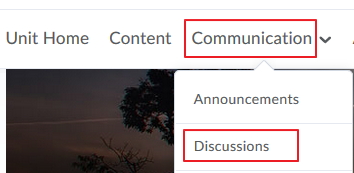
- On the navbar, click Communications then Discussions
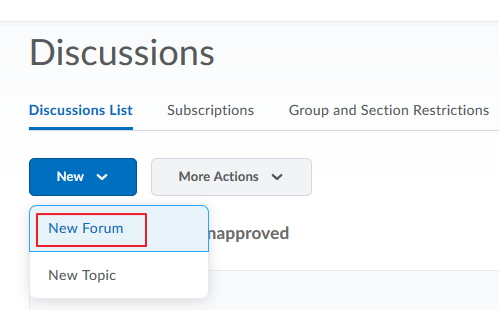
- On the Discussions List page, from the New button drop-down menu, click New Forum.
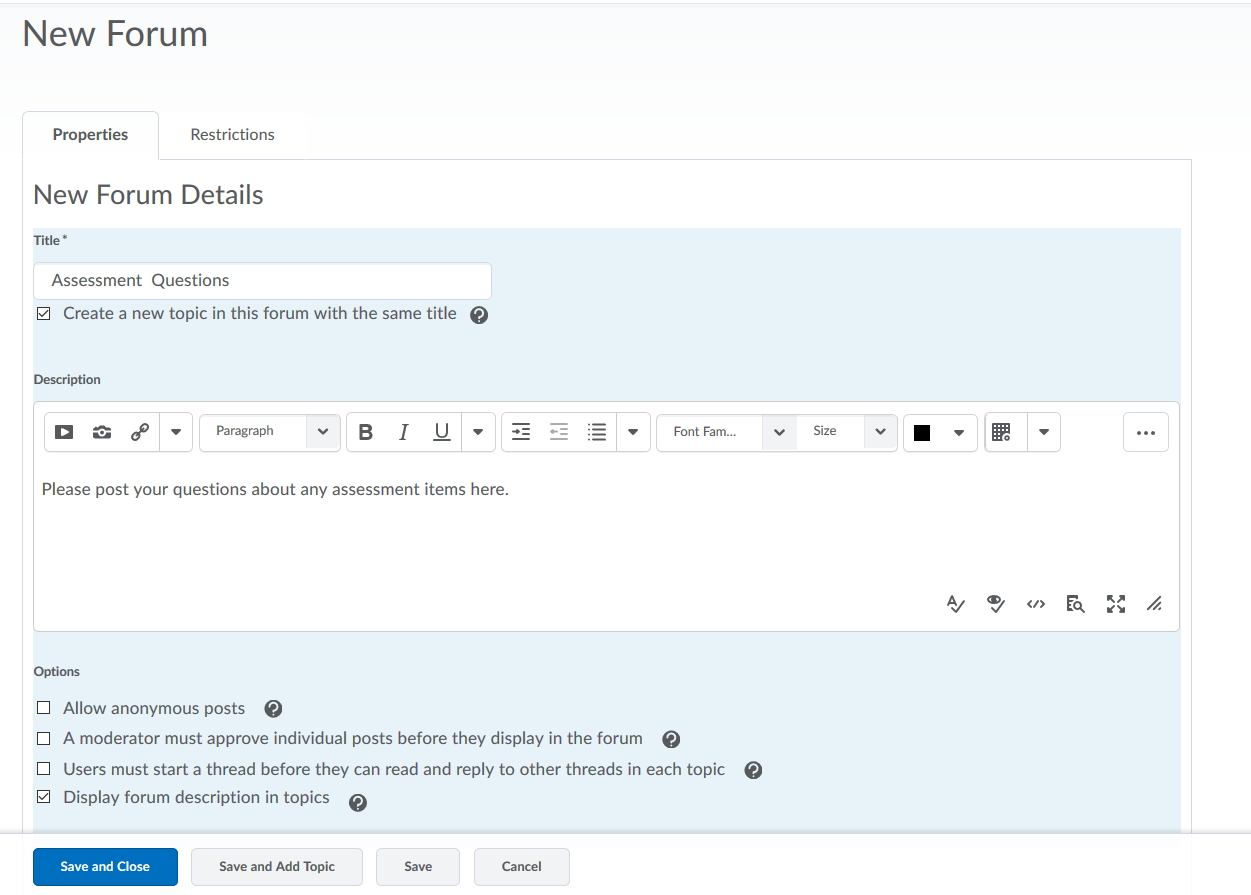
- Enter a title for your new forum.
- Enter a description for your new forum.
- To create a Topic at the same time with the same title tick this option.
- In the Options section, select any of the following check boxes:
- Allow anonymous posts - To enable users to post anonymously.
- A moderator must approve individual posts before they display in the forum - To ensure that posts are approved by a moderator before they display in the forum.
- Users must start a thread before they can read and reply to other threads in each topic - To ensure user participation.
- Display forum descriptions in topics - To provide instructors the option to display a discussion forum description within a discussion topic description.
- Select the Restrictions section:
- Locking Options specify if students can post or reply to a forum based on a specific date set by you. For example, you can set a date to lock a discussion forum after making it available, giving students time to read and understand the discussion forum, but not post replies. You can also set a date to unlock the forum several days later, allowing students to post their well thought out replies.
- Visible with access restricted before start/end. The forum is visible to students before or after the start or end date, but they cannot access it.
- Visible with submission restricted before start/end. The forum is visible to students before or after the start or end date and they can access it, but they cannot post new threads or replies. This effectively makes a discussion read-only.
- Hidden before start/end. The forum is hidden from students until the start or end date. Calendar events for Availability Start and Availability End are hidden until the start or end date. Notifications are also not sent until the start or end date.
- Add automated conditions for access using Release Conditions.
- Apply restrictions to groups or sections.
Forum Restrictions Screen below:

Create a discussion topic
Your unit can have multiple forums and topics, but you must create a forum before you can create a topic since all topics belong to forums.
- On the navbar, click Communications then Discussions
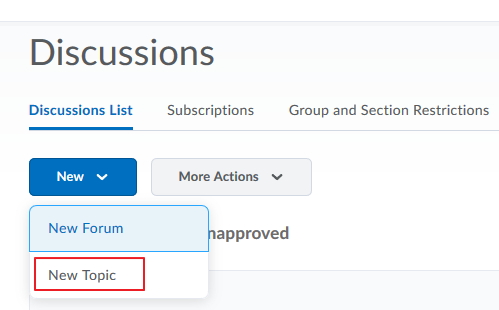
- On the Discussions List page, from the New button, click New Topic.
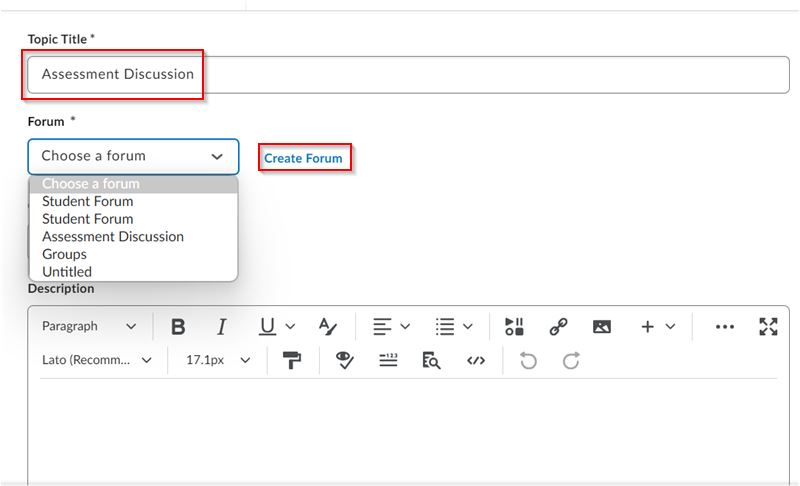
- On the New Topic page, do the following:
- Enter a Topic Title.
- Click Choose a Forum to select a forum or Create Forum to create a new one.
- To add your topic to your grade book, enter a value in Grade Out Of.
- Enter a Description for your topic using Brightspace Editor.
Note: The Description field has a character limit of 65,535 characters.
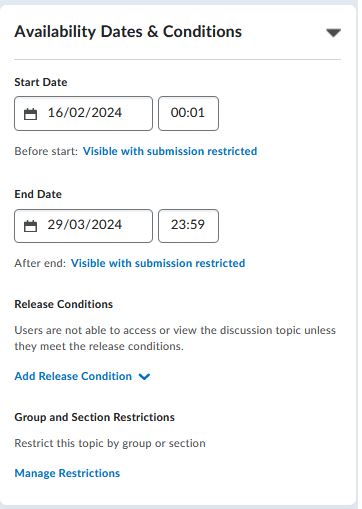
- In the Availability Dates & Conditions accordion, enter the following:
- Enter a Start Date and End Date.
- Adjust the Before end and After end restrictions based on your preferences by clicking each option.
- Click Add Release Condition to create a new release condition or add an existing one.
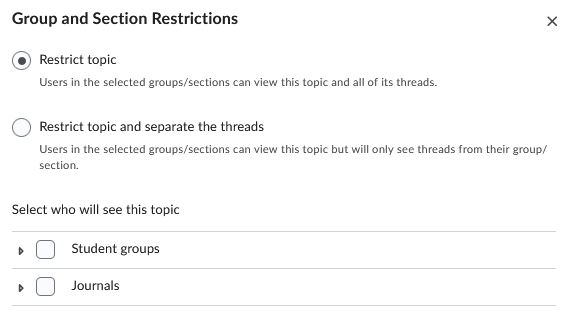
- Under Group and Section Restrictions, you can set different restrictions if you have Groups set up in your unit.
In the Group restrictions options you have the ability to:
- Restrict Topic: or
- Restrict topic and separate the threads.
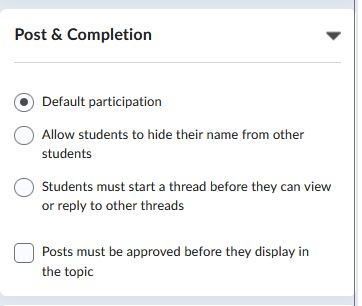
- In the Post & Completion accordion, select any of the following options to apply them to your discussion topic:
- Default participation
- Allow students to hide their name from other students
- Students must start a thread before they can view or reply to other threads
- Posts must be approved before they display in the topic
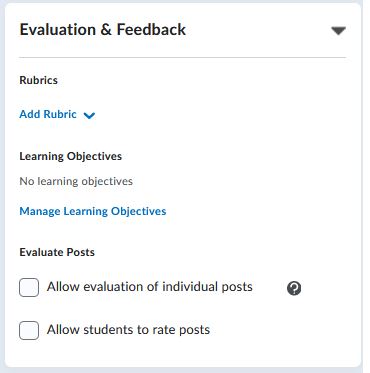
- In the Evaluation & Feedback accordion, do the following:
- Click Add Rubric to attach a rubric to your discussion topic.
- Click Manage Learning Objectives to associate learning objectives to your discussion topic.
- Select Allow evaluation of individual posts to assign scores to posts, and then select your Calculation Method. You can also choose to Include unevaluated posts in the topic score calculation as zero.
- Select Allow students to rate posts to allow students to score each others' posts. Then, select a rating type.
Note: You can also create forums and Topics from within the groups tool if you wish, so that specific forums can only be seen by certain groups.