
MyLO - My Learning Online
Reducing the Size of Your MyLO Unit and Content Files
For more equitable access to your online unit it's important to consider file size. Very large files can be slow or impossible to access if students are logging on to your unit from home with a broadband ( or comparable) connection. This guide suggests some simple ways for you to reduce your unit material file sizes.
Unused Files
Remove any files within the Manage Files section of your unit that are not currently being used.
View your files
- Open your unit in MyLO
- Open Manage Files. To do this on your unit navigation bar press Admin & Help and select Manage Files.
- Click on any folder to display all files in the folder.
- Mouse over any 'suspected' file and select Preview from the action darrow's drop-dwn menu to view the file (the file will open in a new window).
If you find a file that is not being used but may be used in the future, download the file and store it on your computer system, then delete the file from MyLO.
Download Files
1. Select the files or folders you wish to download.
2. Select Download from the Manage Files area. This will zip the file.
- In the Downloading Files window, click on the zip file name. This will complete the download procedure.
- Move the file/s from the Downloads folder to the folder of your choice.
You can now delete this unused file from MyLO.
Delete Files
To delete one file, mouse over the filename and selet Delete from the drop-down menu at the right of the name.
1. Click Yes To confirm.
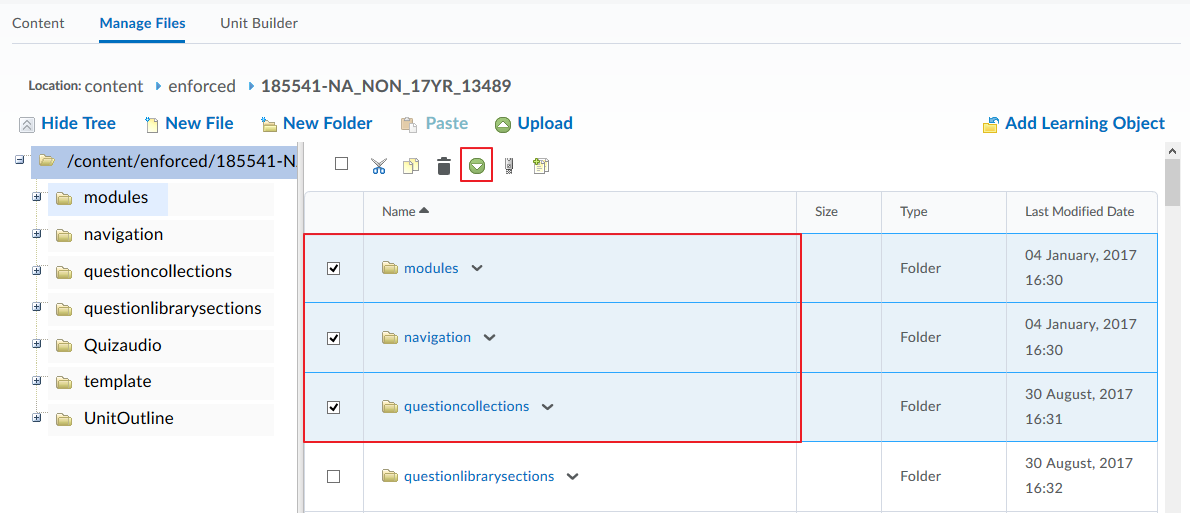
2. To delete more than one file at a time, tick the files you want removed.
3. Select Delete from within Manage Files.
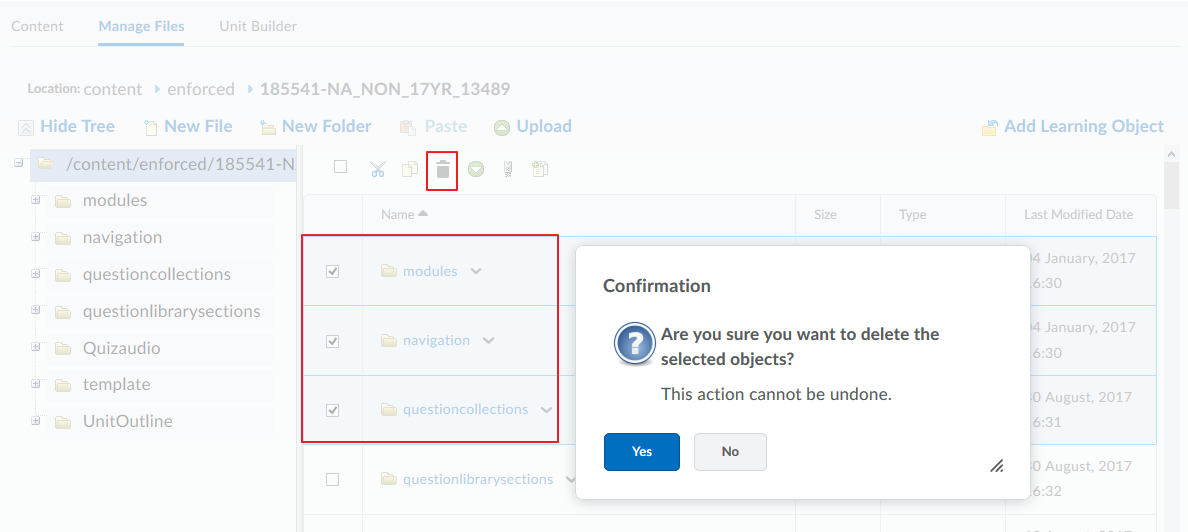
4. Click Yes to Confirm.
Note: It is not necessary to keep past years teachings within your new unit. You will continue to have access to your previously taught units in MyLO to access content. Make sure that you download all files you want to keep before deleting content as they can only be restored by the vendor.
Zip Files
If you have uploaded a zip file, ensure that you delete it from MyLO after you have unzipped it.
1. In Manage Files, locate the zip file, click on its action arrow and select Delete from the drop-down menu.
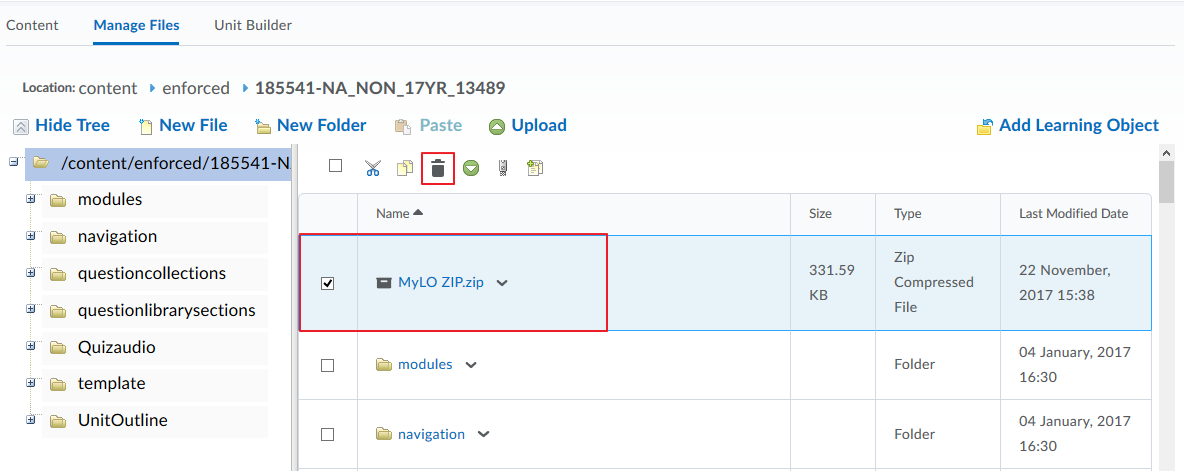
2. Click Yes to confirm
Images
When preparing images to be used with an html file, a PowerPoint presentation or a Word document, you need to consider three aspects if file size is to be minimised:
- if part of the image can be removed (cropped)
- the physical size of the image file
- the file type
Photo editing software such as Photoshop or Paint Shop Pro are ideal for editing image files.[Windows users can also access Paint.NET from http://www.getpaint.net as a free download]. The instructions below are for use the Paint.NET.
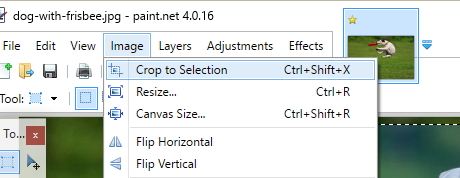
Cropping
Image file sizes can be made much smaller by cropping the image to display only the area you need.
- Open your image file in Paint.Net. Press on the Select Tool to select an area of the image you want to keep.
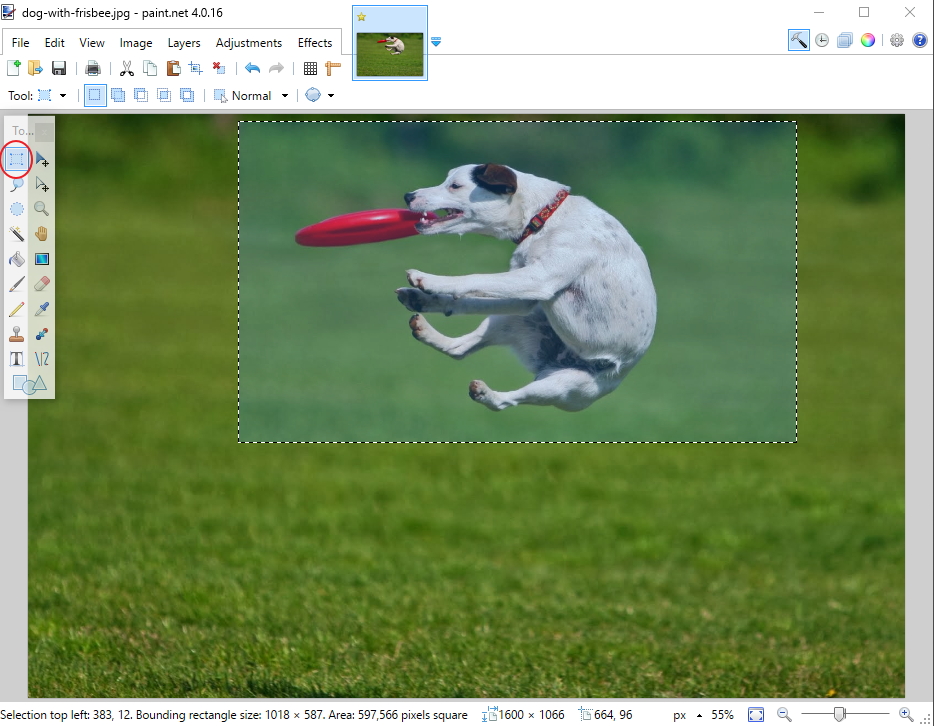
- Select Crop to Selection from the Image tools. Once cropped you can then Save the image as a JPG if your file is a photo or GIF if your file in a diagram.
Physical Size
Ensure that the physical size of the image is no bigger than you need. For example, if you want to display an image that is 5cm by 5cm, don't insert the image at 10cm by 10cm then resize it. Instead resize the file first then insert it.
- Open your image file and click on Image and select Resize.
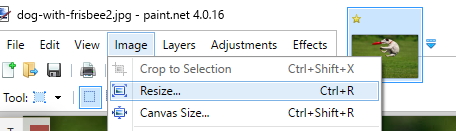
- Put in your new width or height in centimetres. Make sure you have ticked Maintain aspect ratio to ensure the image retains the width-height ratio. Press OK.

- Save your image.
File Type
Images that are to be accessed online should generally be saved as either JPG or GIF files. JPG and GIF are compressed file formats, so our file size is reduced. To get the best quality compressed image, you must save as the correct file type for that particular image.
- JPG JPG is the compressed file format recommended for colour photographs. JPG files display colours well that blend and fade.
- GIF GIF is the compressed file format recommended for illustrations or images using blocks of colour.
PowerPoint
Large colour photos, backgrounds and audio can all significantly increase file sizes. Here are some tips to reduce the size of your PowerPoint files that will allow students to download them more quickly.
- Use the instructions above to reduce the size of image files before you add them to PowerPoint.
- Don't use images as backgrounds as they add to the file size. If an image is required on all slides of a PowerPoint presentation, add the image to the slide master, rather than inserting on each page.
- If you plan to narrate your PowerPoint, consider using MyMedia ALP Desktop software to capture voice and slides. You can then publish the file directly to your MyMedia Echo Library and the files will be much smaller and in a range of suitable formats. These can then be linked to directly in your unit. Please also note that a narrated PowerPoint will not play directly in MyLO - they need to be downloaded first, whereas the file will work correctly if you use MyMedia.
- Provide the PowerPoint presentation for students as a PDF file with 3 slides per page. This makes a smaller file which is easier and cheaper for students to download and print.
- If you are using PowerPoint and haven't already reduced image size, select the picture in your slide and Choose the Picture tab in the op menu. Click on Compress button, select the options you wish to apply to the operation, and then click OK to save the results.
PDF (Portable Document Format)
When preparing PDF files to be added to an online unit, be aware of the file size. Here are some ways to keep your PDF file size to a minimum.
Image files in PDFs
If you insert images into your PDF file, follow the instructions under Images above to ensure the image files are cropped or resized before you insert into your document.
Use "Save As"
- Open the PDF file in Adobe
- From the menu choose File> Save As
- Tick the option to Reduce the File Size
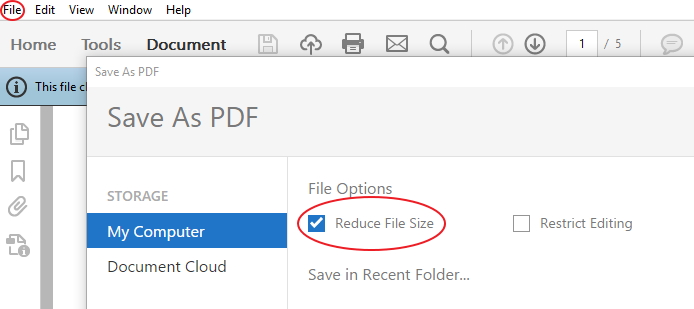
- Press Save
Multimedia files( video, audio)
Multimedia files can be very large. To ensure that the large files are accessible and do not overload the system they are managed differently to document files.
Multimedia files that you produce should not be uploaded directly to your online unit - instead they should be uploaded to the UTAS MyMedia Service in the first instance. You then provide links in your unit to give students seamless access to the multimedia files. the streaming/ download performance of multimedia files will be much improved for students - especially those with slower Internet connections.
Procedure for uploading and linking multimedia files
For more information on how to upload multimedia files at UTAS, and the sorts of files you can upload, visit the MyMedia Service homepage