
MyLO - My Learning Online
Rubrics: How to Set up a Rubric
How to set up a Rubric
Everything you need to create your rubric easily is on the one Screen: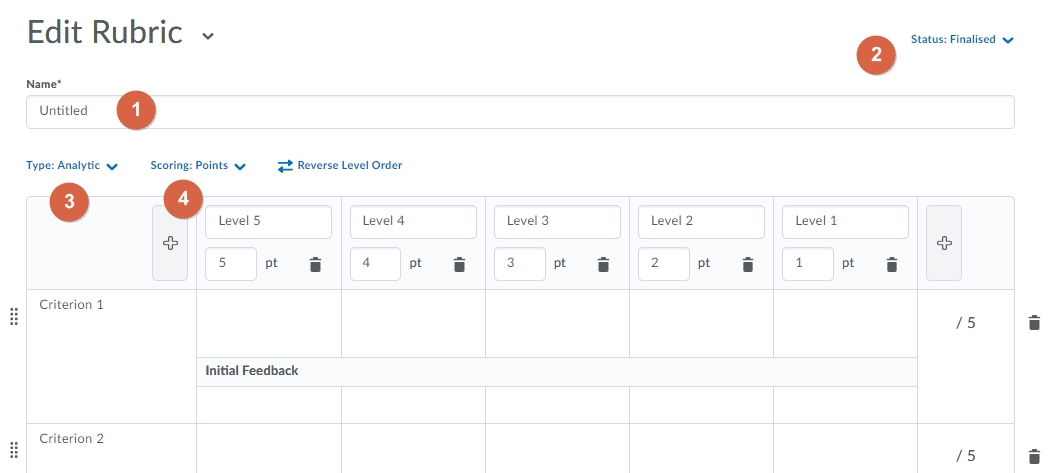
- Put in your Rubric title
- Change the status of your rubric - finalised/ under development/ archived
- Change the type of rubric - holistic or analytic
- Change the Scoring method form no score to points or custom points
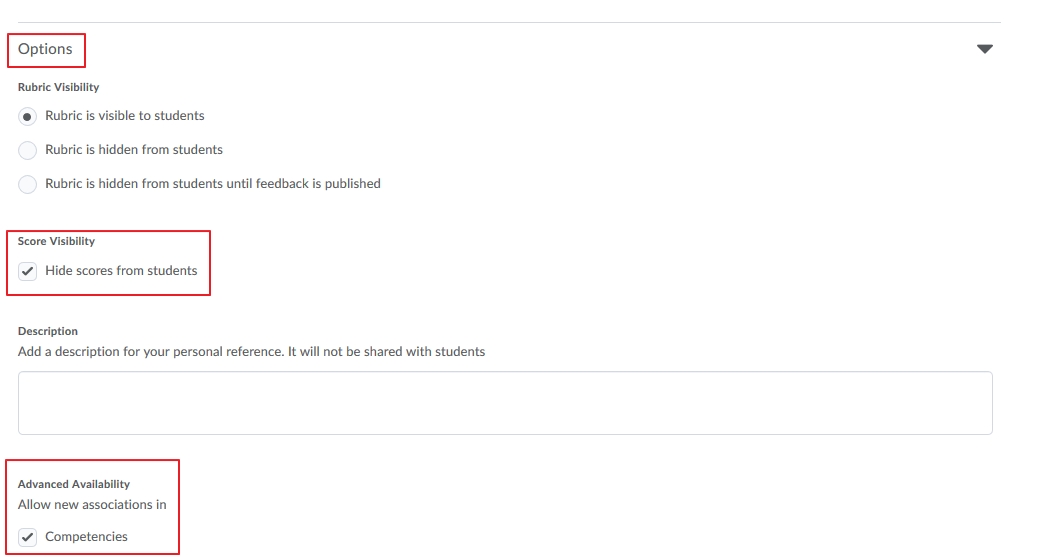
Further down the screen you have other options which you press on top open. This is where you choose the visibility of your rubric, whether to hide scores form students and where you associate the rubric with competencies( this is ticked automatically and this allows you to associate your rubric with an assessment once it is complete).
Text Only and Custom Points Rubrics Options
- Change the Level Names from:
- Level 5 to High Distinction (HD)
- Level 4 to Distinction (DN)
- Level 3 to Credit (CR)
- Level 2 to Pass (PP)
- Level 1 to Fail (NN)
Points Rubrics
Follow the steps above, and then:
- In the Score(points) field for the High Distinction, enter the number that represents full marks for each criterion (e.g., if there are 5 criterion, enter 20 (5x20=100))
- In the Score(points) field for the Distinction, enter the number that represents the highest mark for that grade (e.g., if the HD is 20, enter 15.5)
- In the Score(points) field for the Credit, enter the number that represents the highest mark for that grade (e.g., if the HD is 20, enter 13.5)
- In the Score(points) field for the Pass, enter the number that represents the highest mark for that grade (e.g., if the HD is 20, enter 11.5)
- In the Score(points) field for the Fail, enter the number that represents the highest mark for that grade (e.g., if the HD is 20, enter 9.5)
You may find this Points Calculator useful in determining the highest mark to place in each field
- Replace the text Criterion 1 in the first Criterion Name field with the complete description of your first assessment criterion
- Repeat for each criterion
- Select the Save button
- Select the action arrow for the Overall Score and select Edit Levels from the drop down menu
- Change the Level Name fields from:
- Level 5 to High Distinction (HD)
- Level 4 to Distinction (DN)
- Level 3 to Credit (CR)
- Level 2 to Pass (PP)
- Level 1 to Fail (NN)
- Select the Save button
- Select the action arrow for the first criterion and select Edit Criterion
Text Only and Points
- In the Description field for the first level, enter the standard descriptor for a High Distinction. If you have saved this already in another document, use your keyboard shortcuts to copy and paste (copy = Ctrl+c | paste = Ctrl+v)
- In the Description field for the second level, enter the standard descriptor for a Distinction. Repeat for each subsequent level description and the corresponding standard descriptor.
Custom Points
- In the Score field for the first level, enter the number equal to the weighting of the first criterion (e.g., for a criterion with a weighting of 35%, enter 35).
- In the Description field for the first level, enter the standard descriptor for a High Distinction. If you have saved this already in another document, use your keyboard shortcuts to copy and paste (copy = Ctrl+c | paste = Ctrl+v)
- Repeat these two steps for each of the remaining levels, entering the maximum score for each level in the Score field. You will find the Points Calculator useful in determining the highest mark to place in each field.