
MyLO - My Learning Online
Using Announcements in MyLO
Announcement items appear on the Unit Home page and can be created to provide updates, reminders and general class news. The ability to include links to unit content or external websites can draw students' attention to unit updates, assignments that are due, developments in current issues, etc.
To create and publish an Announcement:
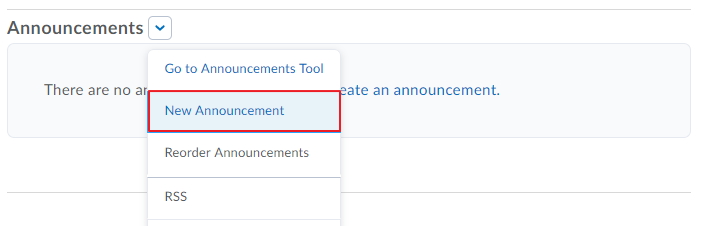
- From your unit homepage select New Announcement item from the drop down menu on the Announcement Widget.
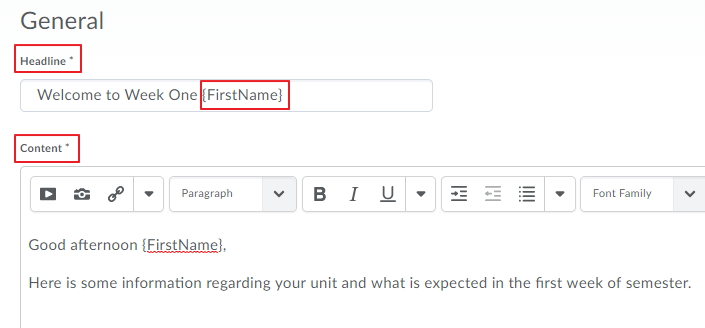
- Write your Headline and Content. In this case a replace string* has been used so that the user will see their first name appear in the announcement.
- You can add links to specific content and activities within the unit and to external websites. You can also insert pictures, embed videos and record audio.
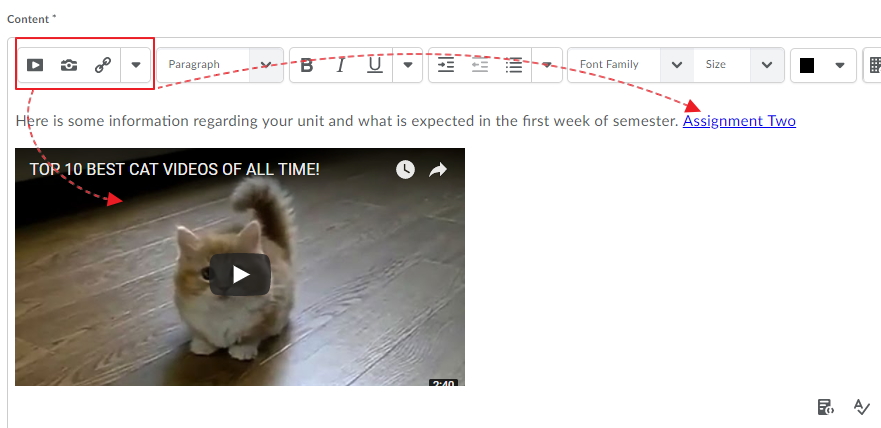
Note: that some features will not be sent to users if they have notifications turned on to receive announcements via email. They will need to access MyLO itself to see videos and images. - Select a start and end date for your announcement item to appear. Setting availability dates prevents a build-up of redundant announcements and means you can manage announcements ahead of time. This is also important if you are using a previous delivery of your unit - you do not want your new students to be sent outdated messages.
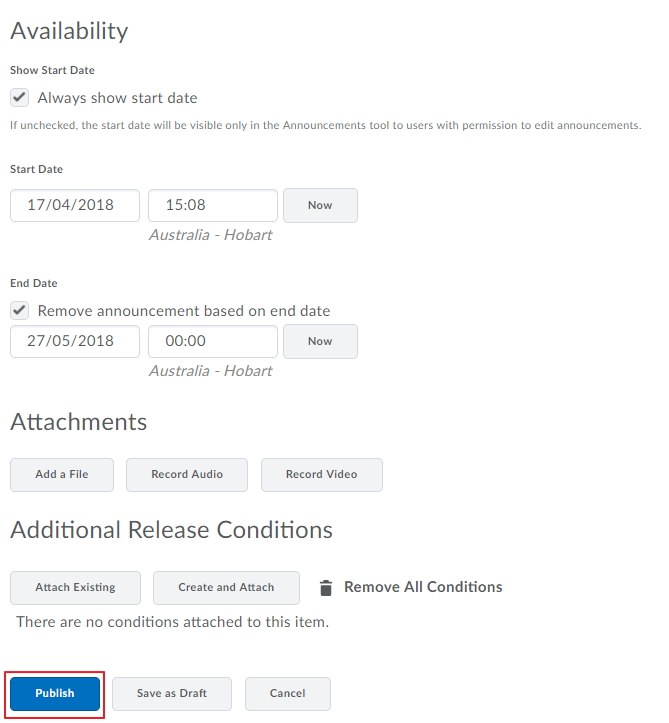
- Add any attachments with Add a File and set any Additional Release Conditions. Click Publish when you are ready to display the completed announcement on the Unit homepage. Setting as Draft will allow you to continue editing the item until it is ready to be released. If the start date is set to a future date, it will appear as a scheduled item.
* Common Replace strings:
| Replace string | Description |
|---|---|
| {OrgUnitName} | Name of the organisation unit |
| {OrgUnitCode} | Code for the organisation unit |
| {FirstName} | First name of the user |
| {LastName} | Last name of the user |
Modifying Announcements:
Once an announcement is published you can edit the item by pressing the edit item from the drop-down menu next to the announcement. You can add further text or update the start and end dates.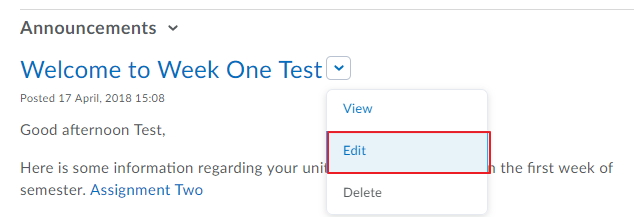
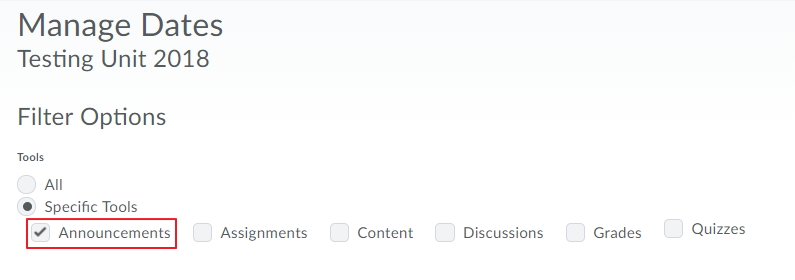
- If you have brought over all your content via choosing a previous delivery you can update the start and end dates of all your announcements you want to reuse in bulk. To do this go to Admin & Help/ Unit Admin/ Manage dates. Select the specific tool option and tick Announcements then press Apply filter.
- Go to the Announcement you want to edit and select to Edit the dates.

- Put in your new dates and Save and go to the next item.
Pinning an Announcement
You can pin an announcement to the top of the page to ensure that it is easily seen by learners.
- From the Announcements widget, click the context menu and select Go to Announcements Tool.
- From the drop-down menu beside the announcement you want to pin, click Pin to top.
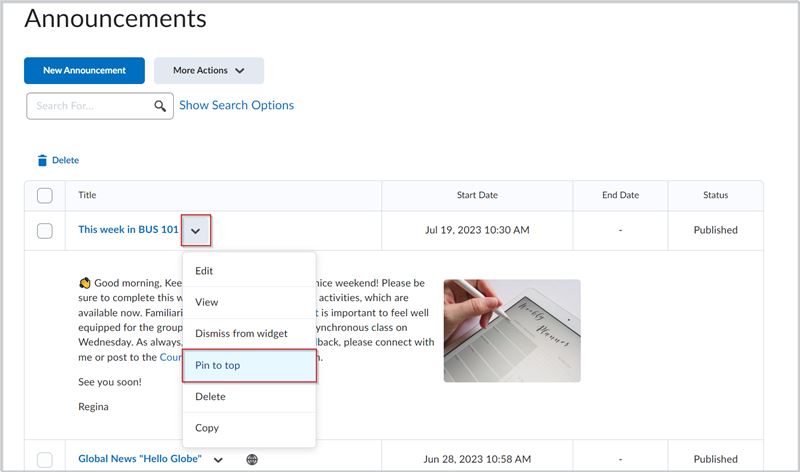
Figure: Select Pin to top from the drop-down menu to pin this announcement.
Figure: Pinned announcements are indicated with the pinned icon.
Unpin an announcement
- From the Announcements widget, click the context menu and select Go to Announcements Tool.
From the drop-down menu beside the announcement you want to unpin, click Unpin.
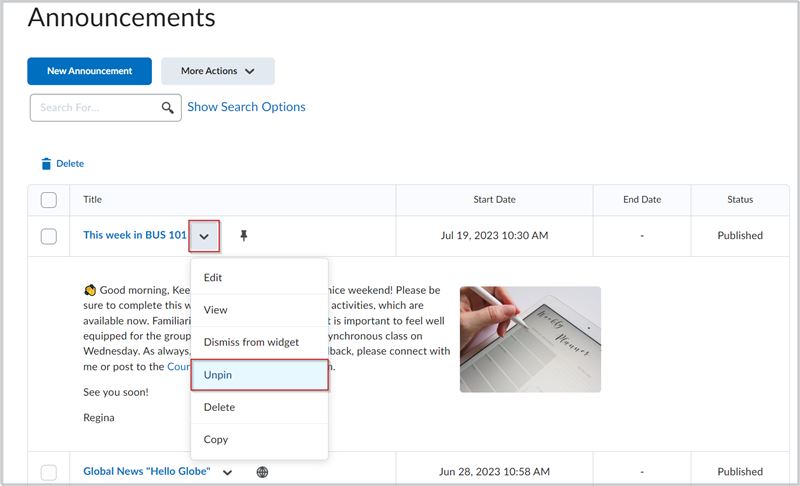
Figure: Select Unpin from the drop-down menu to remove an announcement from the top of the page.
Delete and restore announcements
Delete announcements or restore a deleted announcement from the Announcements tool.
To delete an announcement
- From the Announcements widget, click the context menu and select Go to Announcements Tool.
- Select any announcements you want to delete and click Delete.
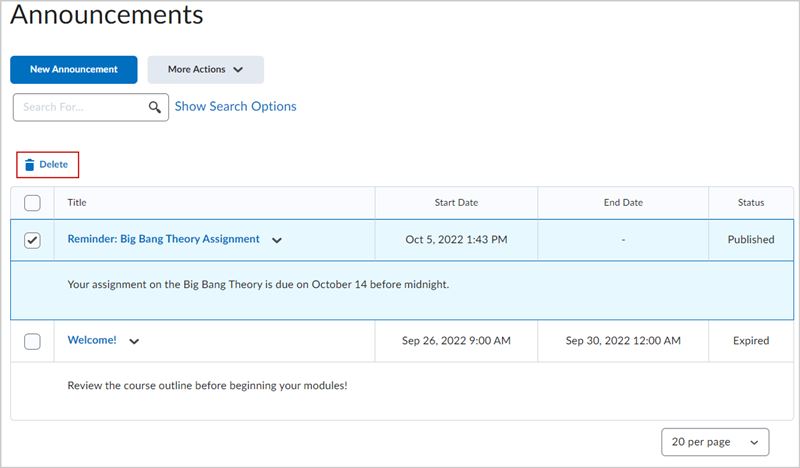
Figure: The Delete button on the announcements page. - Click Yes to confirm the deletion.
The selected announcements are deleted.
To restore a deleted announcement
- From the Announcements page, click More Actions and select Restore.
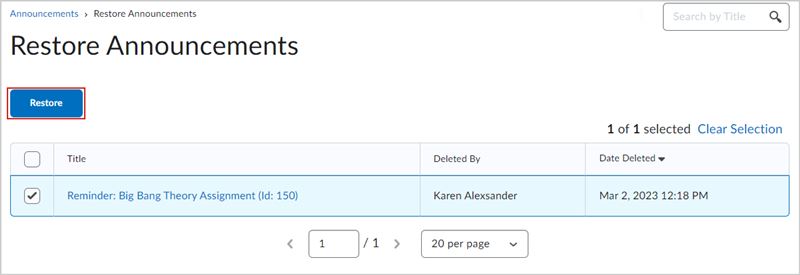
Figure: The Restore button on the Restore Announcements page. - Select the announcements you want to restore and click Restore.
The announcements are restored and available on the unit home page.
Copying Announcements to other units:
This feature adds the ability to copy announcements to other units. Users must be enrolled in both the source and destination units with a role that has the new permission enabled to copy announcements.
A single announcement can be copied to multiple unit offerings. Users can copy announcements from the Announcements tool or the Announcements widget from the context menu of an announcement by selecting Copy to Other Units. Once copied, the announcement is in a draft state and users must publish the copied announcement in the destination unit to complete the copying process.
The following attributes are copied:
- Headline
- Display Author Information
- Content
Note: The copied Content attribute includes any associated files such as inserted images. - Start and End Date
- Attachments
- Pin state
Note: Release conditions are not copied.