
MyLO - My Learning Online
Marking with a Rubric
Here is an ‘Example Rubric’ that has been set up in a MyLO unit ; the Criteria and Level descriptors are merely for illustrative purposes! Note that a rubric can continue to be edited by the instructor until it is ‘associated’ with an assessment task , at which point it becomes ‘locked’.
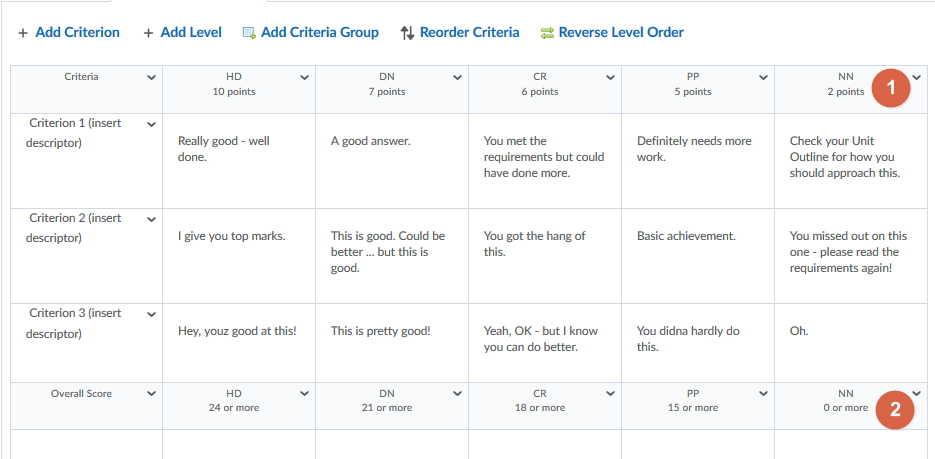
- Levels have been renamed as Grades, and the Level columns have been reordered from highest to lowest.
- This Overall Score row is independent of the Level Columns. It shows what Level (grade) the student will be given as their final mark when points are summed.
Properties selected to create this example rubric:
- Type: Analytic
- Scoring method: Points*
- Hide scores from student views'
*Because Points was selected, each criterion is equally weighted. By choosing Custom Points variable weightings can be specified.
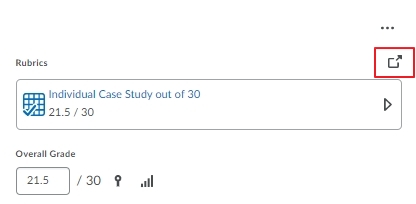
The 'Example Rubric' was associated with an assignment to be submitted through an Assignment Folder. ( For this example the total possible Points through the rubric = 30 , but the assignment itself has been specified as worth 20% of the total unit mark, so the final score will have to be shown appropriately, as explained next.) To mark an assignment from the Assignment Folder, click the Evaluate link to be presented with the Evaluate Submission page where you can access the rubric and provide individual feedback to the student. (See also the Desktop Guide ‘ Marking Assignments using MyLO’.)
Marking the Rubric in a new window:
Press on the highlighted icon below to open in a new window
Select the appropriate radio button for each criterion.
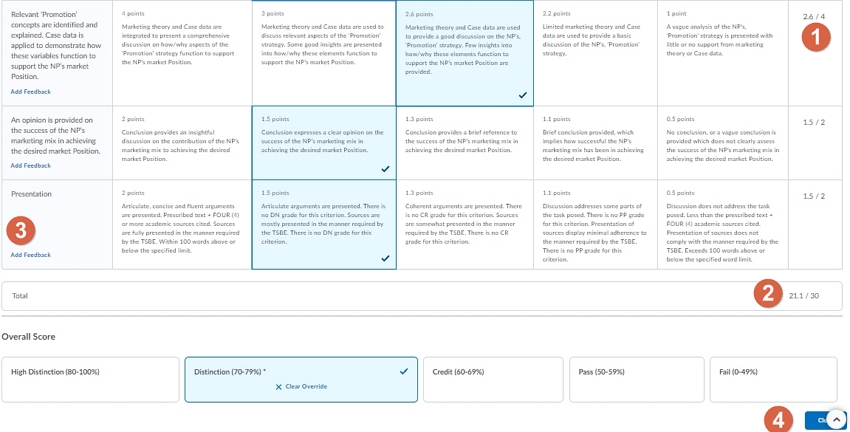
- Points indicated in this column reflect the default appearing for the selected Level. You can change the points if using an Analytic Rubric.
- Total score is calculated as a sum of the allocated points. Note in this example the actual points are only visible to the instructor because the option of" Hide scores from student views' was selected when creating the rubric.
- Add further feedback for the student on this specific Criteria
- When marking is complete, select the option to Close to return to the Evaluate Submission page. This saves your assessment to the Evaluation page but it remains at Draft status at this stage.
Marking the Rubric inline:
Press on the rubric to open up the criteria:

- Use the arrows or your mouse to move across the different levels of the criteria
- The selected criteria level will be larger and have tick against it
- Hovering over any level will give you the score and information on the level that is currently in focus.
Further Feedback: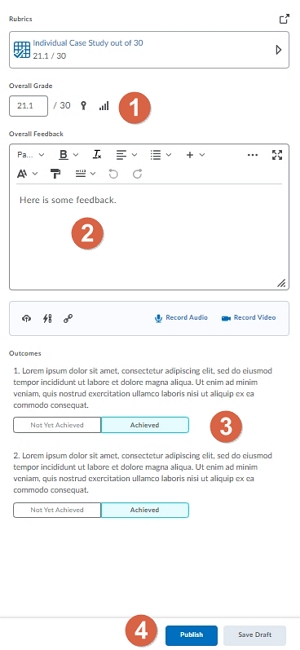
- Points can be adjusted here if necessary - for instance, if a late penalty applies.
- Any overall feedback may be provided to the student here, including recording audio comments.
- Any Learning Outcomes can be selected here.
- Select Publish to return the mark and feedback to the student; Save Draft allows marks to be released later
And this is the Feedback that the student will see in their assignment folder once the Grades are released.
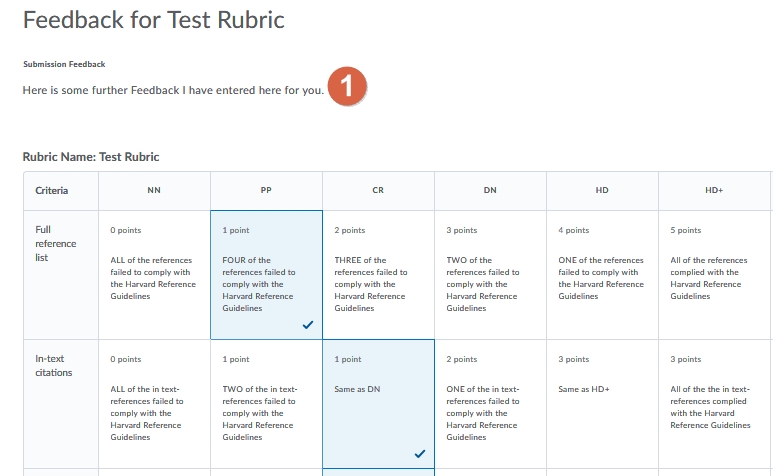
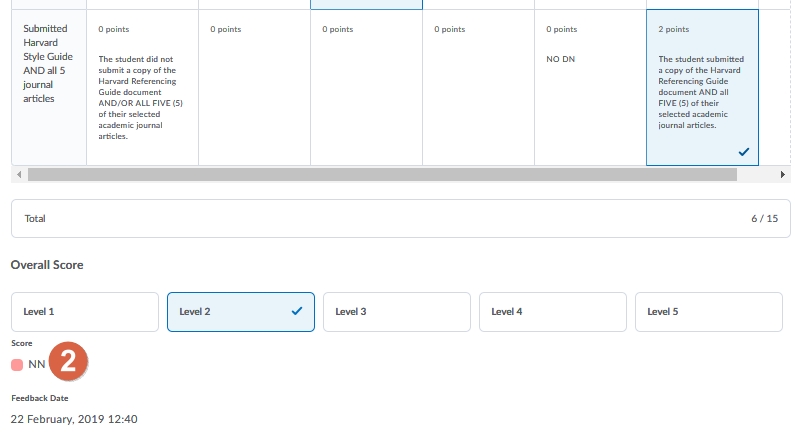
- This is the overall feedback that was provided by the marker.
- The student will see the grade (score) as had been previously specified in the rubric set-up. No points are shown in this example to the student.
The student can also view this information via the Grades, if there is a grade item associated with the assignment.
