
MyLO - My Learning Online
Zoom in MyLO
Adding Zoom to your MyLO Unit
You can create and share a scheduled Zoom meeting with your students within your unit.
Adding Zoom into your MyLO Unit:
In order to use Zoom within your unit, you will first need to add a link to the Zoom client.
NOTE - if you wish to use the Echo360 Zoom integration for sharing recordings you will need to add your Echo360 LTI link to your unit. Instructions on adding an Echo360 link are available in this help guide
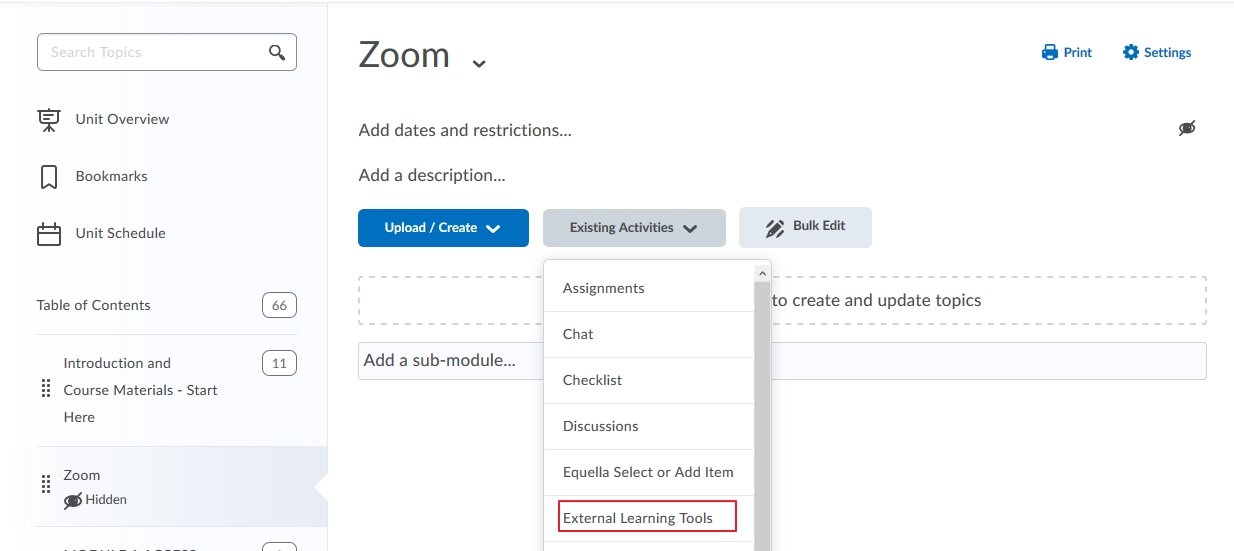
- Access your unit. Go to content. Create a new Module called Zoom.
- From Existing Activities select External Learning Tools
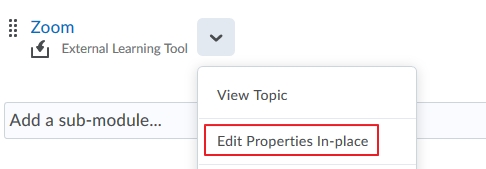
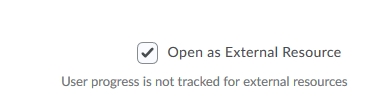
- Choose Zoom. Edit Properties In-Place and select to open as an External Resource
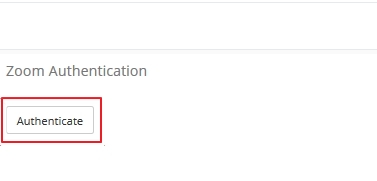
- Press on Zoom. The first time accessing Zoom within Brightspace/MyLO, you will need to authenticate your account. At the Zoom Authentication screen click Authenticate. This screen will no longer appear in the future when you click this link.
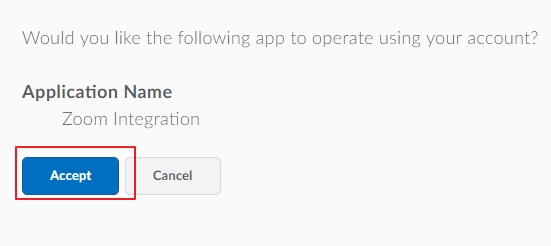
- You will be asked if you would like the Zoom integration to operate using your account. Click the Accept button. You will no longer get this message after accepting.
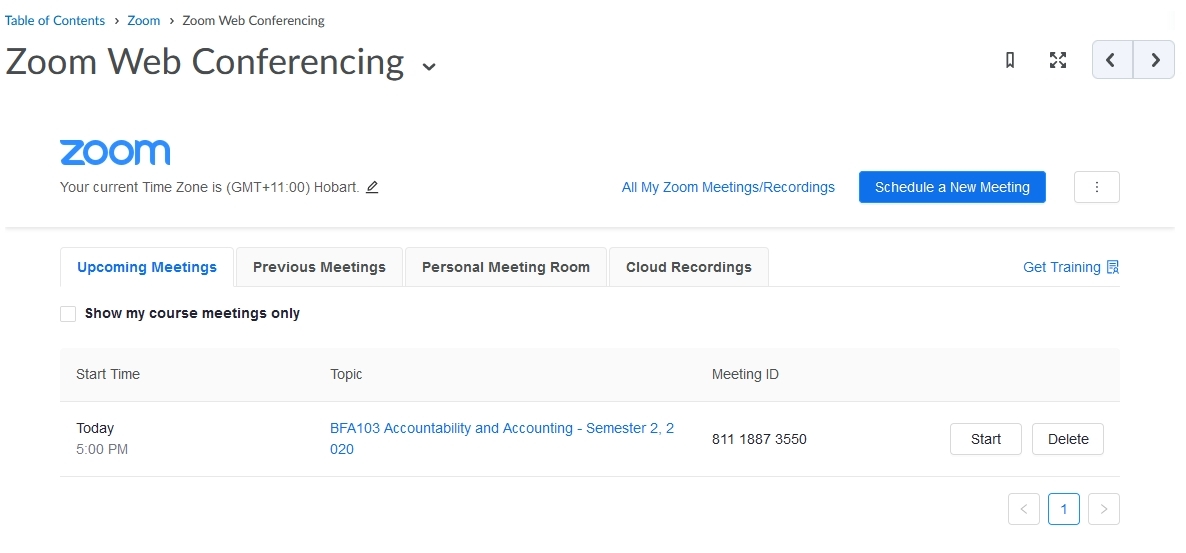
- You will then be taken to the Zoom integration screen where you can see upcoming meetings, previous meetings, and your personal meeting room.
Scheduling a Zoom Meeting
Scheduling a Zoom Meeting within MyLO:
- Press on Schedule a New Meeting.
- You will be taken to the Schedule a Meeting page where you can fill out all the meeting options you wish to use.
- The topic title will be the Unit Code and title of the unit. Edit this to add any other information required. Best practice will be to keep the unit code as part of the Topic.
- Select a date and time for the meeting to start.
- Put in how long you want the meeting to go for. Note that this is only for scheduling purposes. The meeting will not end after this length of time.
- Your Time Zone will be auto selected depending on your settings.
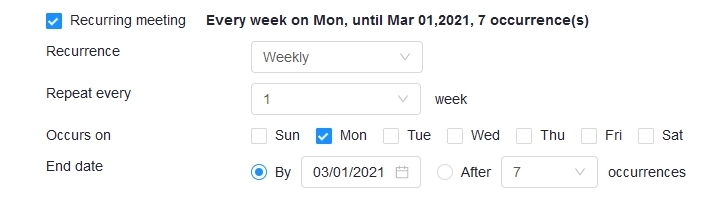
- Select if you wish to have this set as a recurring meeting. If you tick this option you will get the screen below:
 Recurrence:
Select how often you need the meeting to recur: Daily, Weekly, Monthly, or No Fixed Time. It can recur up to 50 times. If you need more than 50 recurrences, use the No Fixed Time option. The other recurrence options will depend on how often the meeting recurs. You can configure the meeting to end after a set amount of occurrences or have the recurring meeting end on a specific date. - Select if you want your video and your Participants video turned on or off by default when entering the room. Note this can be changed by the user once they enter the room
- Tick any other meeting options you want.
- Press on Schedule Meeting
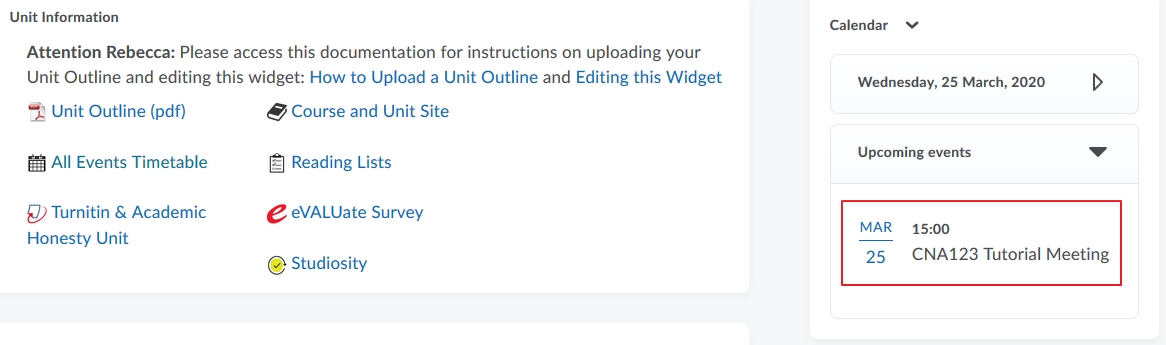
- Any Zoom meeting you schedule within the unit will be automatically added to the unit Calendar - which is why it is important to give the meeting an appropriate name.
Accessing Your Zoom Meeting within your Unit
Your students can access the Scheduled Zoom session in two ways:
You, and your students can access the meeting via the link in the unit calendar.
- Access the Unit Calendar on the Unit homepage and press on the Scheduled meeting
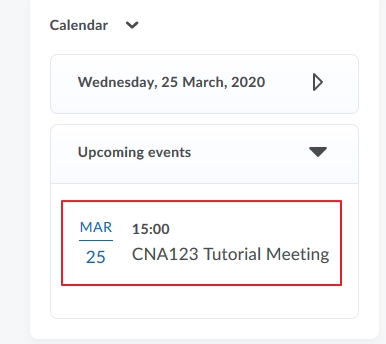
- Press on the Option to enter the Zoom Meeting.
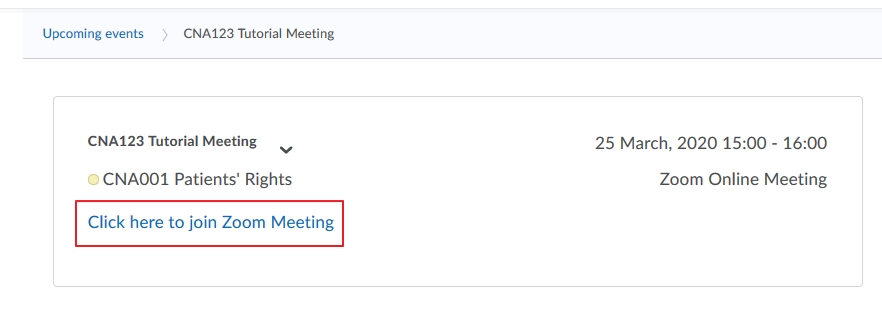
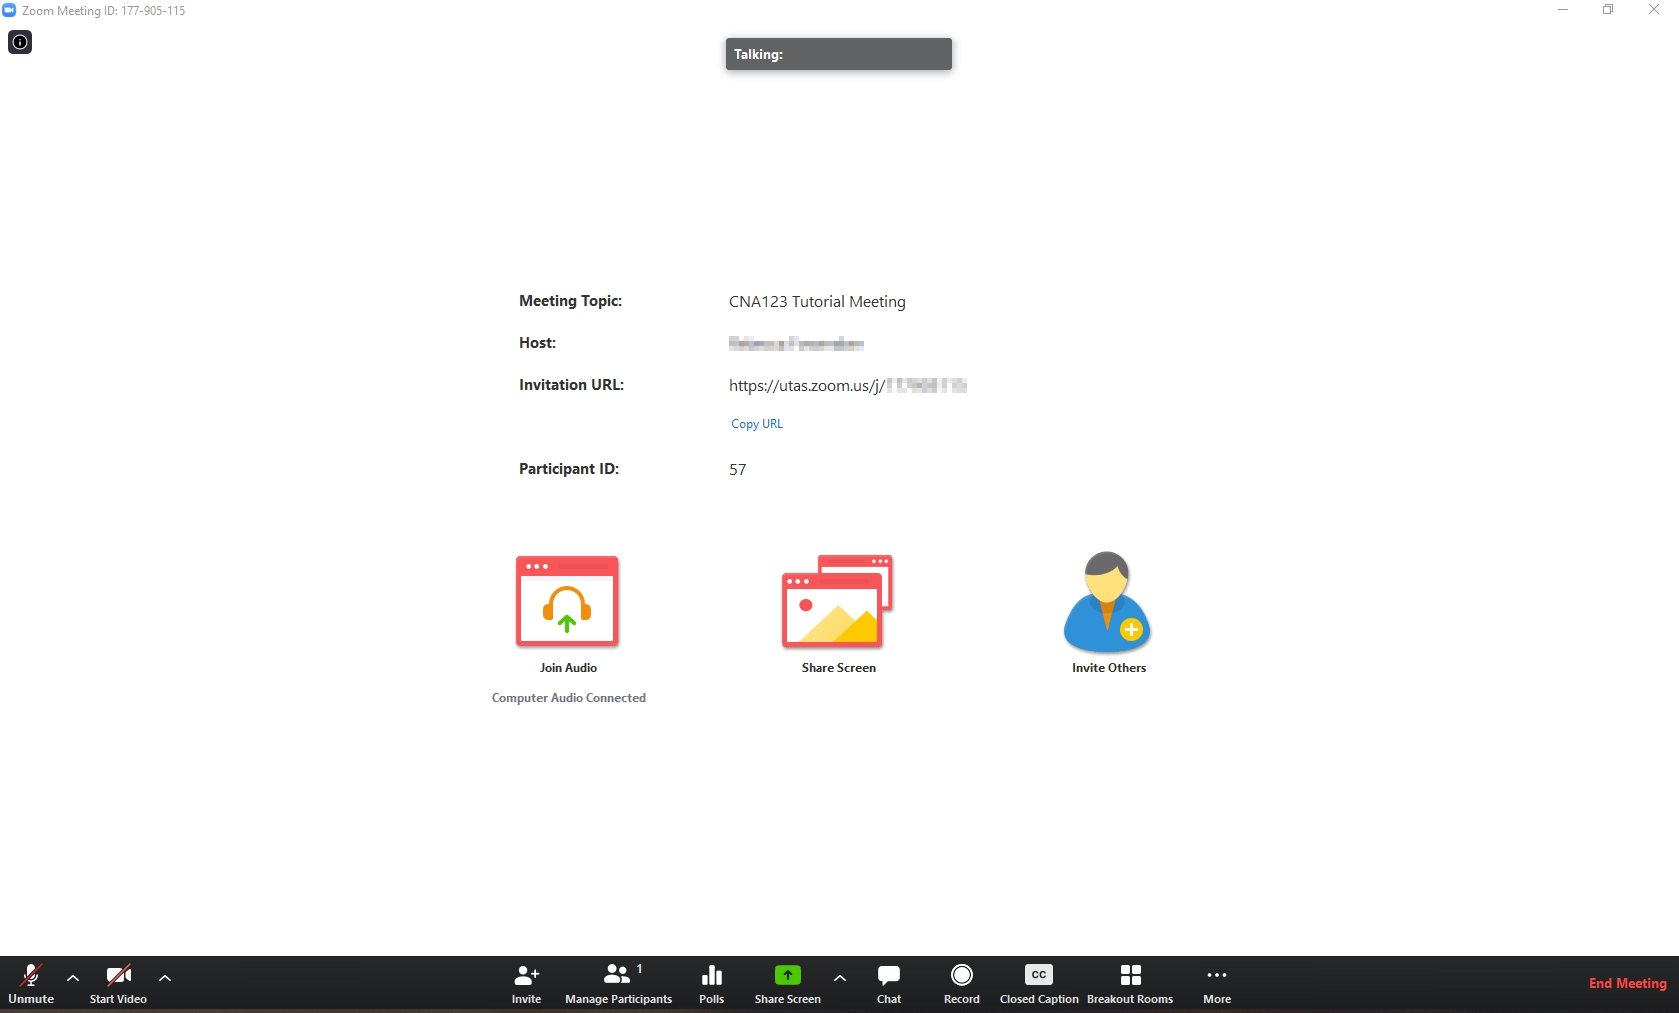
- Zoom will open.
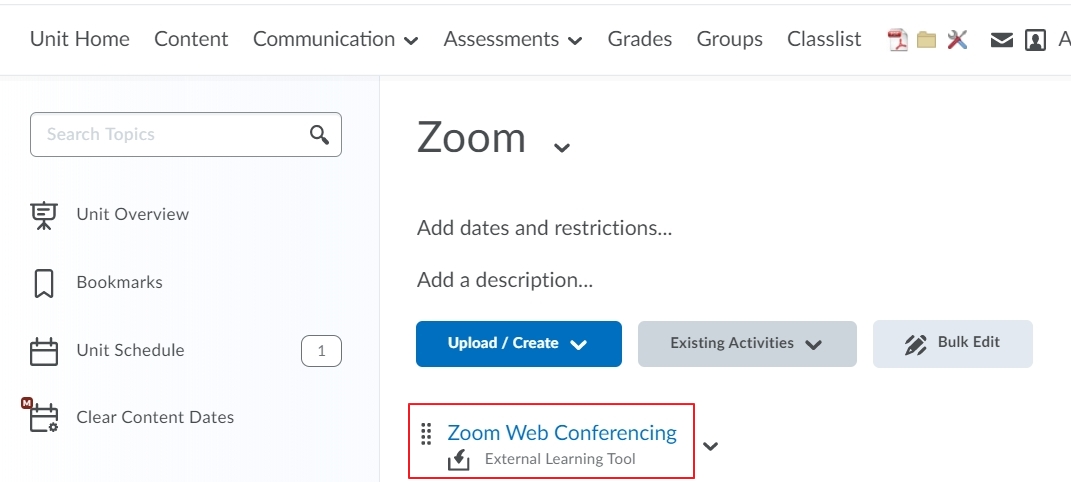
The Second option is to access via the link in Content.
If you are the Creator of the Zoom session or have sent an email to other staff as alternate hosts then this will also appear in your Zoom app to join from.
Accessing your Recordings
Note: Your recording will not begin to process until the scheduled end time has been reached.
View within Zoom Client:
If you created the Zoom session then you can access the recording within the App version of Zoom and going to Meetings/ Recorded.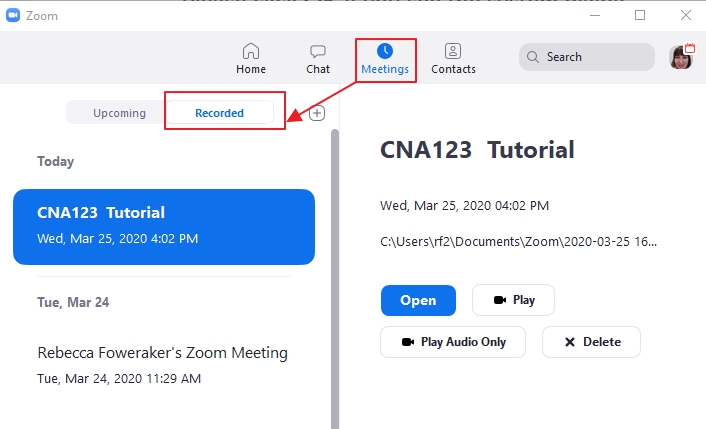
View within MyLO:
To access within your unit press on Previous Meetings or Cloud Recordings. 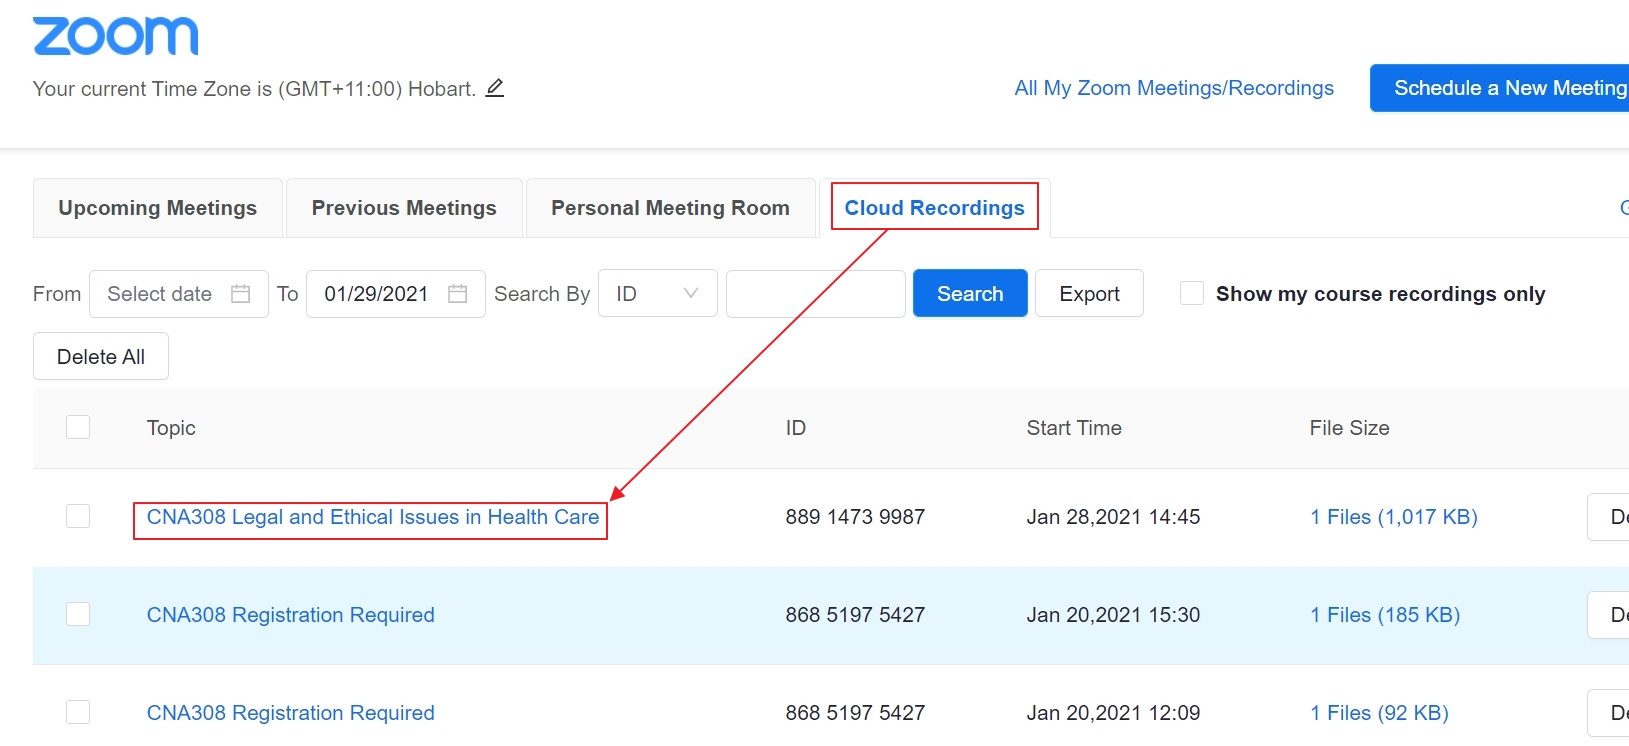
You will then have the option to view the recording, download it or share the recording with others. If you choose to share the recording with users outside of your unit it will open up in a new window with all the information you require to email external users. See image below for options.
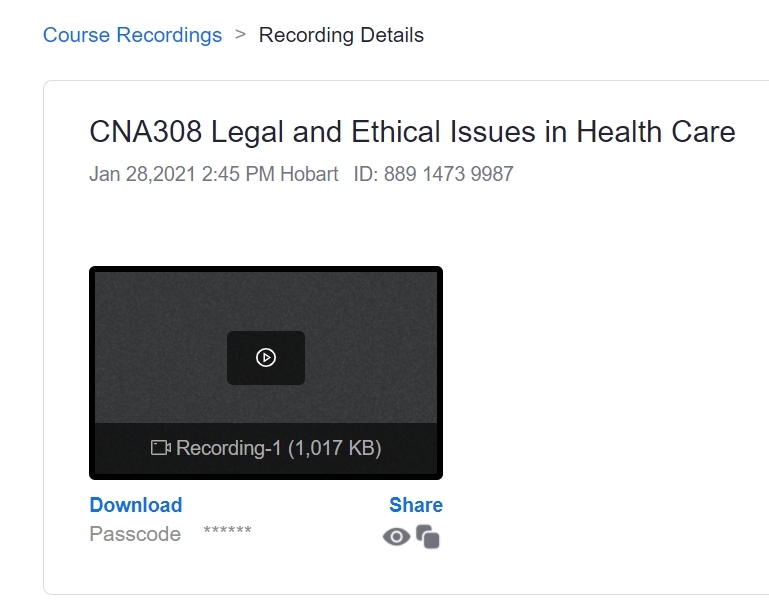
If you wish to play the recording. Pressing on the recording will open the recording in a new tab to view. Recordings made earlier than 16th July 2021 require you to enter a passcode to view. When you press on the play icon within Zoom, the Passcode of the recording will be auto copied.
A green pop up will appear like below.
You can then press paste to fill in the passcode on the next screen and the Zoom session will be available to play.
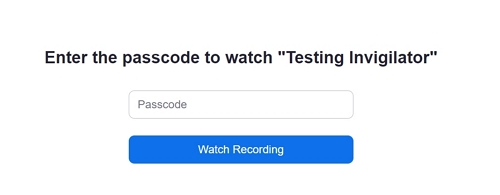
If you are asked to sign into Zoom itself press on SSO - this may occur if you have ticked the option to have users authenticate via Zoom in the session.
View within Echo360:
If you have chosen to have your Zoom recording go to the cloud, and you have an account within Echo360, your recordings will also be accessible from your personal Echo360 library
If you have chosen to have your Zoom recording go to the cloud, and have added an Echo360 LTI link into your MyLO unit prior to adding the Zoom LTI link and scheduling your meetings, your Zoom recording will also be published to your unit's Echo360 section (provided it is longer than 5 minutes)
A guide for students is available here.
Sharing your Recordings
Sharing to Echo360 Section:
If you choose to have your Zoom recording go to the Cloud, and you have a LTI link to your Echo360 section within your unit (added prior to the Zoom schedule) and your recording is longer than 5 minutes, the mp4 recording will be uploaded directly into your unit's Echo360 section.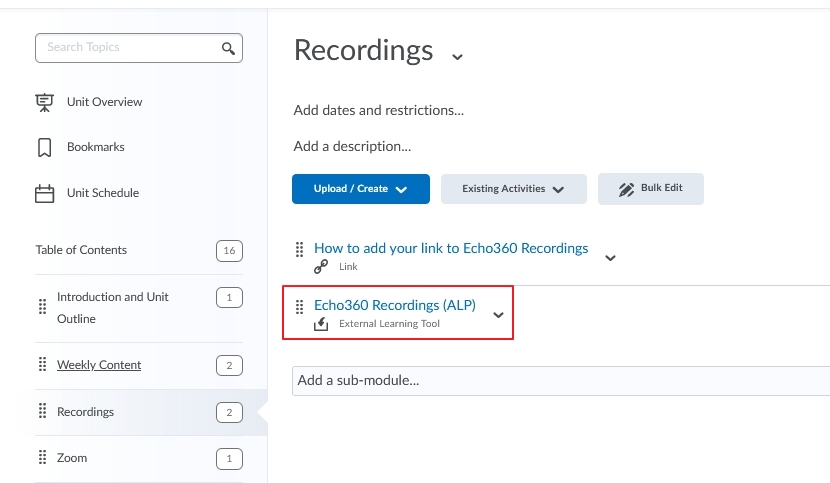
Zoom recording added to Echo360 Section automatically can be seen in the example below.

Note: that depending on the size, length and the number of other files being loaded into Echo360, it could take a few hours before the recording appears within your Echo 360 unit section.
Sharing via Zoom:
If you do not add the Echo360 Link to your MyLO unit, and you select to record to the cloud the Zoom recording will go to your Personal Echo360 Library. This can be shared within a MyLO unit or with external users. Information on how to do this is found in this guide.
You will also be able to share the link from within Zoom. Open the Web App. Press on Meetings and Recorded. Select Open. From here you can share the link with users outside of your unit.
Sharing Local Recordings:
If you decide to not record to the cloud, your Zoom recording will be saved onto your computer in the destination you have specified.
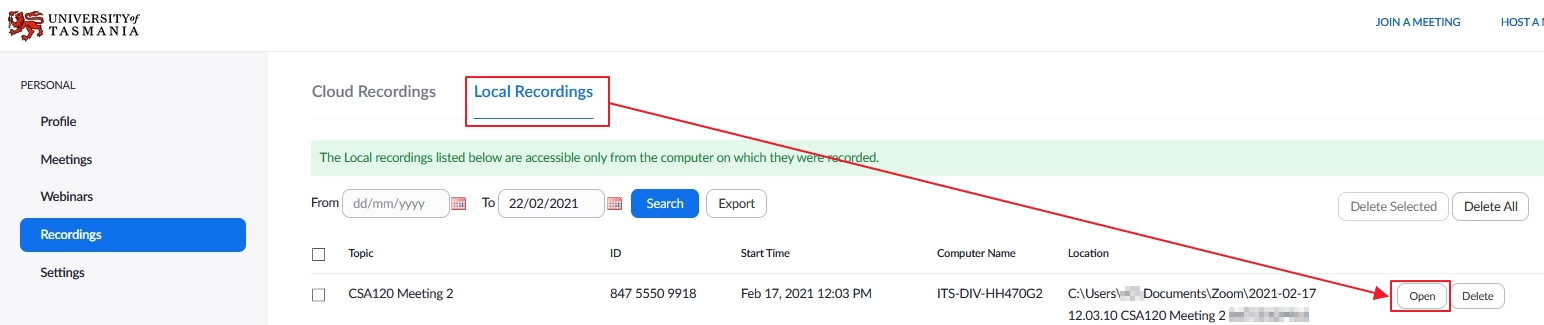
If you are unsure of where this is open up Zoom to access all of your recordings - both those in the Cloud and Locally: https://utas.zoom.us/recording/
Press on Local Recordings. Search for the recording you wish to share and press Open. You can then import the file into your Echo360 library and share with users as per the information in the guide above.
Zoom Settings Best Practice
Cloud Recording Best Practice Settings
If from within your MyLO unit you have added an Echo360 link and are creating recordings that go directly into your Echo360 section, there are some personal Zoom settings you can update to ensure that your recordings are in the best format.
Press on Zoom and select My Profile.

Scroll down to Settings and update the settings below.
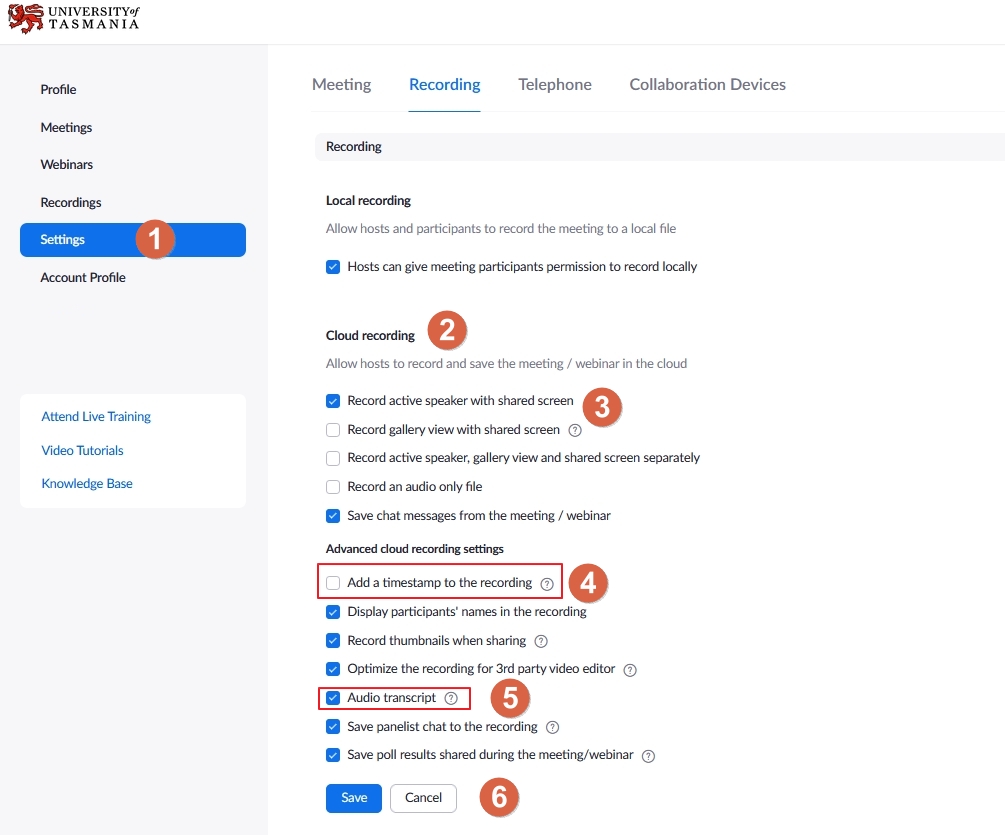
- Press on Settings
- Scroll down to Cloud Recording Section
- Choose which recording you want sent to Echo360. We recommend the Active speaker and Shared screen option.
- Untick the timestamp option. This is not necessary as the date of the recording appears with in your Echo360 Section. Removal of the timestamp also allows for easy reuse of the recording in other units.
- To create a transcript of your recording select Audio transcript. If your recording is then being sent to your Echo360 Section, you can edit the transcript there.
- Press Save
Roles within Zoom
There are multiple roles available for a meeting: host, co-host, alternative hosts, and participants. The role that you have in a meeting is designated by the host.
- Host: The user that scheduled the meeting. They have full permissions to manage the meeting. There can only be one host of a meeting.
- Co-hosts: Shares most of the controls that hosts have, allowing the co-host to manage the administrative side of the meeting, such as managing attendees. The host must assign a co-host during the meeting. Co-hosts cannot start a meeting. If a host needs someone else to start the meeting, they can assign an alternative host.
- Alternative hosts: Shares the same controls as co-hosts, but can also start the meeting. Hosts can assign alternative hosts when they schedule a meeting.
Comparison
The following table compares the meeting controls available to the host, co-hosts, alternative hosts, and participants.
Note: Features with an asterisk (*) can be disabled by the host.
| Feature | Host | Co-host / alternative host | Participants |
Participating in the meeting | |||
| Start the meeting | ✔ | see note below | |
| Mute/unmute themselves* | ✔ | ✔ | ✔ |
| Start/stop their own video | ✔ | ✔ | ✔* |
| View participants list | ✔ | ✔ | ✔ |
| Share screen | ✔ | ✔ | ✔* |
| Request or give remote control | ✔ | ✔ | ✔ |
| Chat with participants (in-meeting chat) | ✔ | ✔ | ✔ |
| Save in-meeting chat | ✔ | ✔ | |
| Create or edit polls | ✔ | ||
| Start polling | ✔ | ✔ | |
| Answer polls | ✔ | ||
| Assign someone to enter closed captions | ✔ | ||
| Enter closed captions | ✔ | ✔* | ✔* |
| Use call-out to join audio by phone | ✔ | ✔ | ✔ |
| End meeting | ✔ | ||
| Reactions and nonverbal feedback | ✔ | ✔ | ✔ |
| Reorder video | ✔ | ||
Managing participants | |||
| Mute or unmute participants | ✔ | ✔ | |
| Stop participant's video | ✔ | ✔ | |
| Ask participant to start video | ✔ | ✔ | |
| Spotlight a video | ✔ | ✔ | |
| Promote participant to host or co-host | ✔ | ||
| Change who attendees can chat with | ✔ | ✔ | |
| Remove attendees | ✔ | ✔ | |
| Put participants on hold | ✔ | ✔ | |
| Rename participants | ✔ | ✔ | |
| Invite others to join | ✔ | ✔ | ✔ |
| Mute controls for participants (ask to mute, mute all, mute on entry) | ✔ | ✔ | |
| Assign participants to breakout rooms | ✔ | ✔ | |
Recording | |||
| Start cloud recording | ✔ | ✔ | |
| Start local recording | ✔ | ✔ | ✔* |
| Allow or forbid a participant to start local recording | ✔ | ✔ | |
Live streaming | |||
| Live stream on Facebook | ✔ | ||
| Live stream on Workplace | ✔ | ||
| Live stream on YouTube | ✔ | ||
| Custom live stream | ✔ | ||
Note:
- Alternative hosts can start the meeting by using the meeting ID or meeting link the invitation email. The meeting will not display in the upcoming meetings list in the desktop client or mobile app for alternative hosts.
- Co-hosts cannot start meetings scheduled by the host. Co-hosts cannot be assigned ahead of time. The host has to promote a participant to co-host. Alternatively, the host can assign a user as an alternative host.
Adding Alternate Hosts to Zoom
When scheduling a meeting, the host can designate another Licensed user on the same account to be an alternative host. This means they need to be a University of Tasmania staff member. The alternative host can start the meeting on the host's behalf. This user will receive an email to their UTAS inbox notifying them that they've been added as an alternative host, with a link to start the meeting. They can also access the link via the Zoom link in the unit.
Limitations
- The alternative host can start the meeting using the join link in the email or calendar invite sent to them by the host. The meeting will not display in the upcoming meetings list in the desktop client, mobile app, or web page for alternative hosts.
- If the original host joins after the alternative host, the original host will always regain control of the meeting and become host. In addition, the alternative host will change roles. If the co-host feature is enabled for the meeting, the alternative host will become a co-host. If the co-host feature is disabled, the alternative host becomes a normal participant.
Designating an alternative host
There are two ways in which an alternate host is added to Zoom within a MyLO unit.
- Any lecturer, tutor or Support person within the unit will be added as an alternate host once they press on the link to Zoom in the unit.
- You can add Alternate hosts manually. This can be done in two ways:
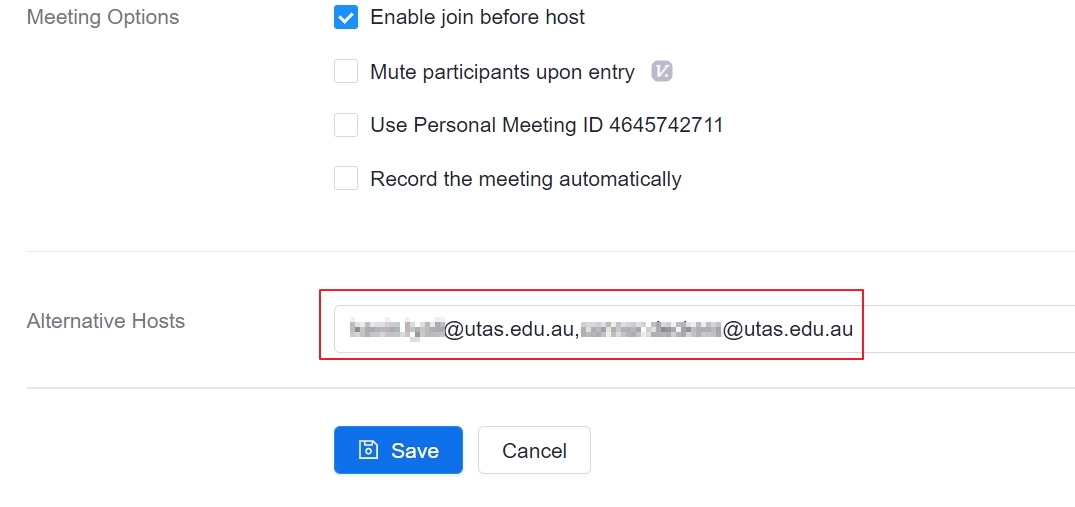
- Add an alternate host to a specific Zoom Schedule. Add a UTAS email address. You can add more than one user, just separate by a comma. Press Save when complete.
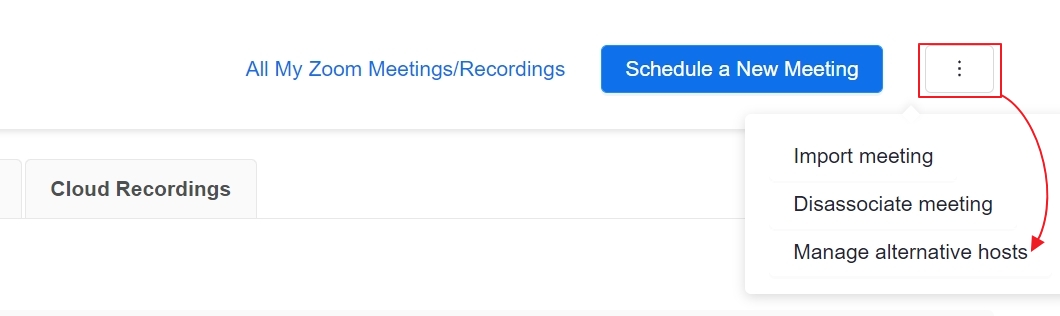
- Add Alternative hosts so that these auto populate in every scheduled Zoom meeting. To do this press on the three dots next to Schedule a Meeting at the top of the Zoom screen. Press Manage alternative hosts.
 Enter a UTAS email address. You will see any users email addresses here if they have pressed on the Zoom link and are in the unit as a lecturer/ Tutor etc.
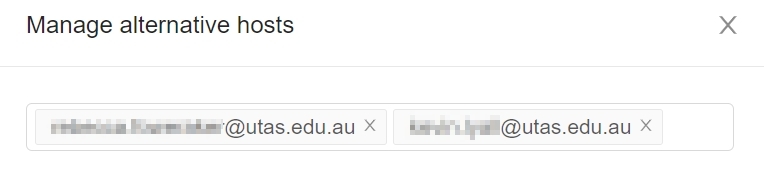
- Add an alternate host to a specific Zoom Schedule. Add a UTAS email address. You can add more than one user, just separate by a comma. Press Save when complete.
Note: If you need to add a user outside of UTAS, you will need to copy the Zoom invitation and send it to them via email. Once they are in the meeting you can make them a co-host.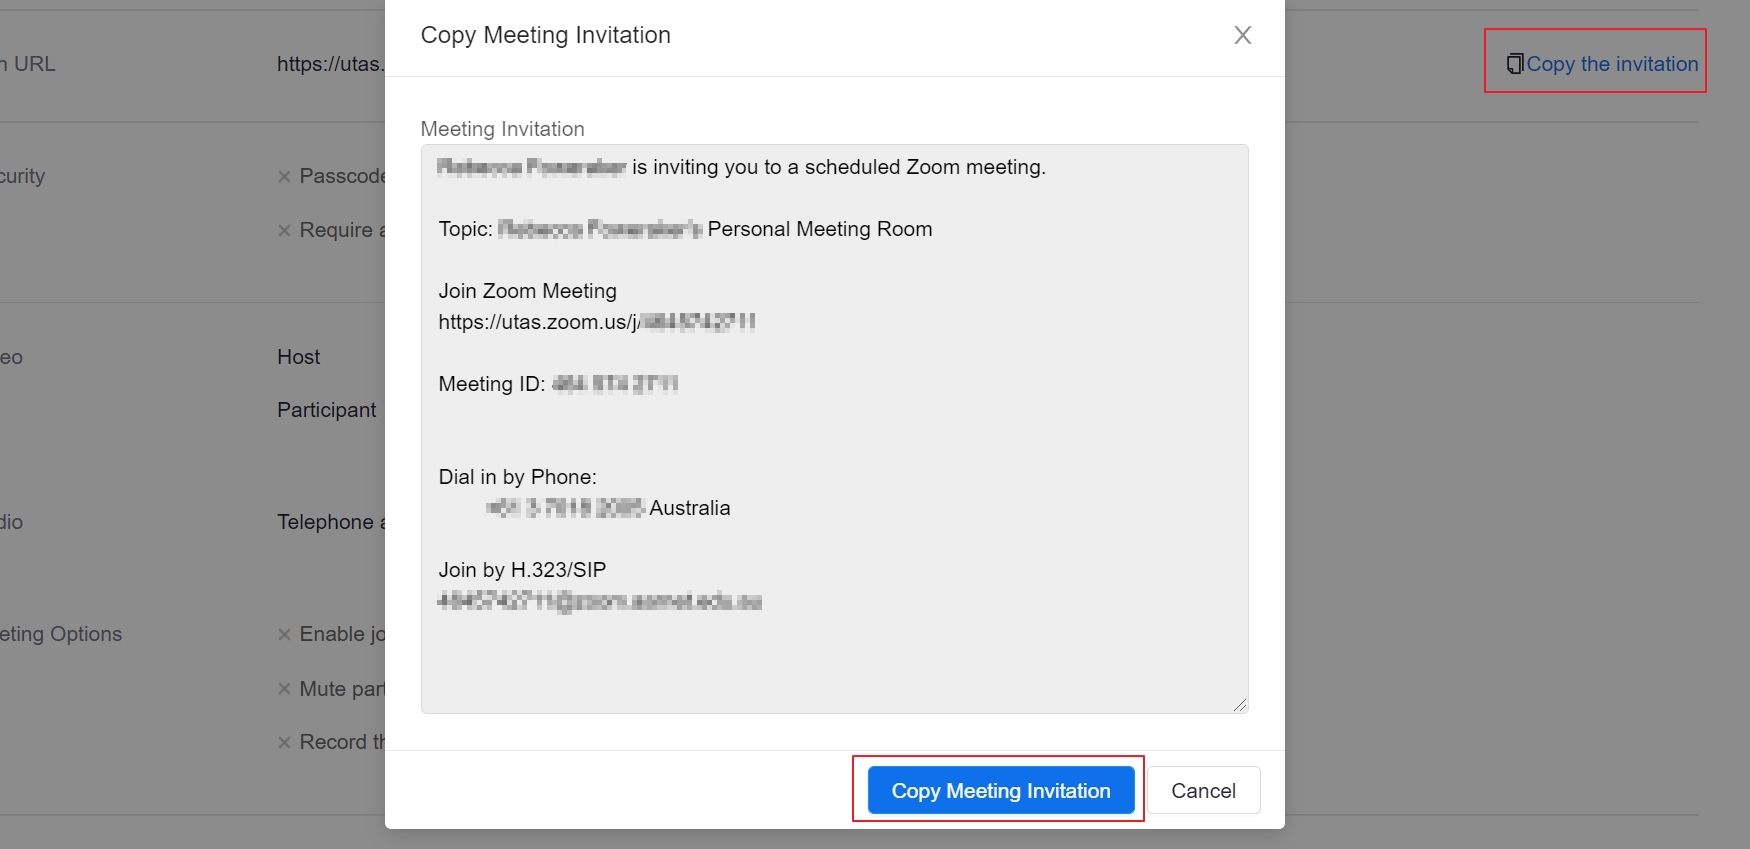
Cloud Zoom Recordings pushed into Echo360
As per the guide here if you have both a link to Zoom within your unit and a link set up to point to your Echo360 section any scheduled Zoom recordings made within your unit will also appear in your Echo section, provided that they are longer than 5 minutes.
NOTE: the Echo360 section for your unit must be linked to the MyLO unit by adding the Echo360 LTI link before your Zoom Schedule begins. An Echo360 space should be requested via MyLO Manager, and this staff guide details how to add the Echo360 LTI link to your units space within your MyLO unit
The Cloud recordings may take a few hours before being made available within Echo360. This will depend on the size of the recording, the length of the recording and how many other recordings are being processed by Echo360 at the time.
Zoom transcriptions will take a few hours to appear within the Echo360 section . The host will receive an email from Zoom when the transcription is ready and able to be edited within Echo360.
Zoom Transcripts
Zoom offers audio transcription of your scheduled meetings if you record to the cloud. After the transcript is processed, it appears as a separate VTT file in the list of recorded meetings within your Zoom app or within the recordings in MyLO. In addition, you have the option to display the transcript text within the video itself, similar to a closed caption display
The transcript is divided into sections, each with a timestamp that shows how far into the recording that portion of the text was recorded. You can edit the text to more accurately capture the words, or to add capitalization and punctuation, which are not captured by the transcript.
Note: If you are using Zoom within your MyLO unit and have your Echo360 section set up as per guide here:https://www.utas.edu.au/mylo/staff/staff-resources/web-conferencing/zoom/zoom-items/sharing-your-recordings you will be able to edit the transcripts within Echo360 once they are available.
To enable your Zoom audio Transcripts:
1. Sign in to you Zoom web portal.
2. Press on your name and select My Profile. A new window will open.
3.Select Settings then Recording. Scroll down and tick the Audio transcript. 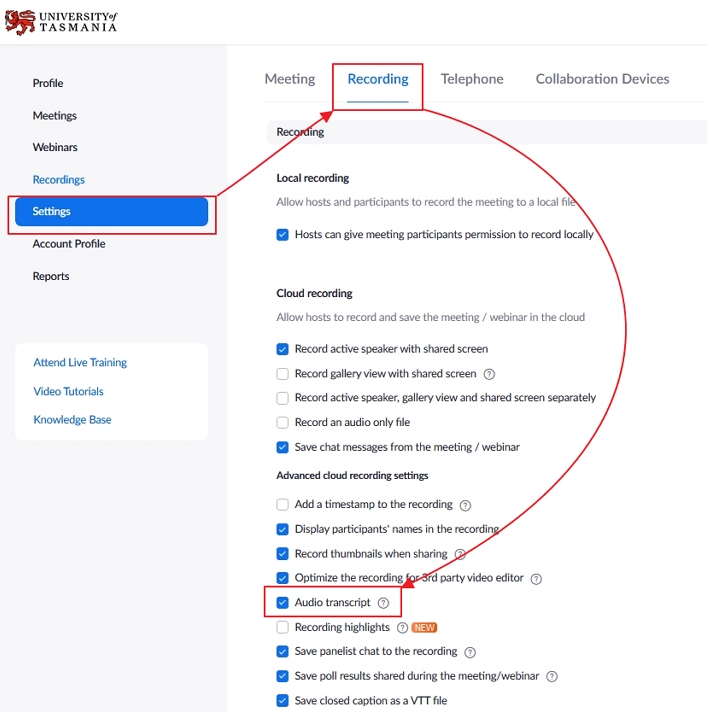
It can take several hours for the Zoom transcript to be ready. You will receive an email from Zoom when the transcript is available to edit.